DIY Tree Topper for a Kitschy 60s Christmas (Pattie and Jenny Boyd Christmas Tree Topper)
- Dec 15, 2025
- 5 min read


Kids. My sister and I are exhausted. So exhausted that we decided not to lug up our 6ft snowy tree from the basement this year and instead are focusing on 4 mini trees we've collected. Each one has a theme: Little Women, Ballet, 90s Celestial and 60s Kitsch. You haven't seen them yet because they are not finished, LOL. Not even close. We'll be putting ornaments up until Christmas Eve-Eve but you know what? I'm fine with that. It's the old way. You're supposed to trim the tree(s) up until the night before Christmas! But with that said, I have been working my little tiny wrists to the bone on homemade ornaments and decor and I'm so pleased with how this topper came out that I decided to dedicate an entire blog on it. The rest of my decor tips can be found on my IG, but let's go into detail on how I did this one because honestly there's some handy things I've done here that I do for lots of other crafts.
Supplies I Used (My items are found/repurposed/in my existing supplies but I found comps on amazon and the following images are linked to my associate account where I might make a few cents to help cover the cost of running this blog! Thank you)
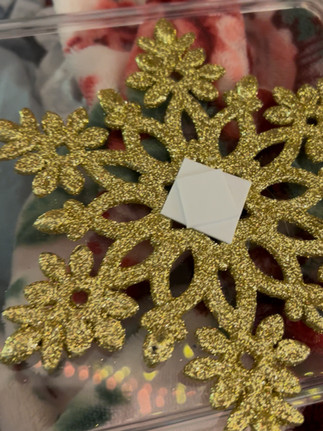
GLITTER SNOWFLAKE- We had a bunch of these that were ornaments but most of them have broken! They were shitty quality- I remember my sister saying she did not order them, they were just thrown into the pile when we first moved here so I've been rescuing them and using them for crafts. NOW if you do not have one of these around, you can make one out of pipe cleaner in the size you require or glitter foam, anything you can cut into a snowflake and glitterize...whatever you want for your snowflake base, get it, queen.

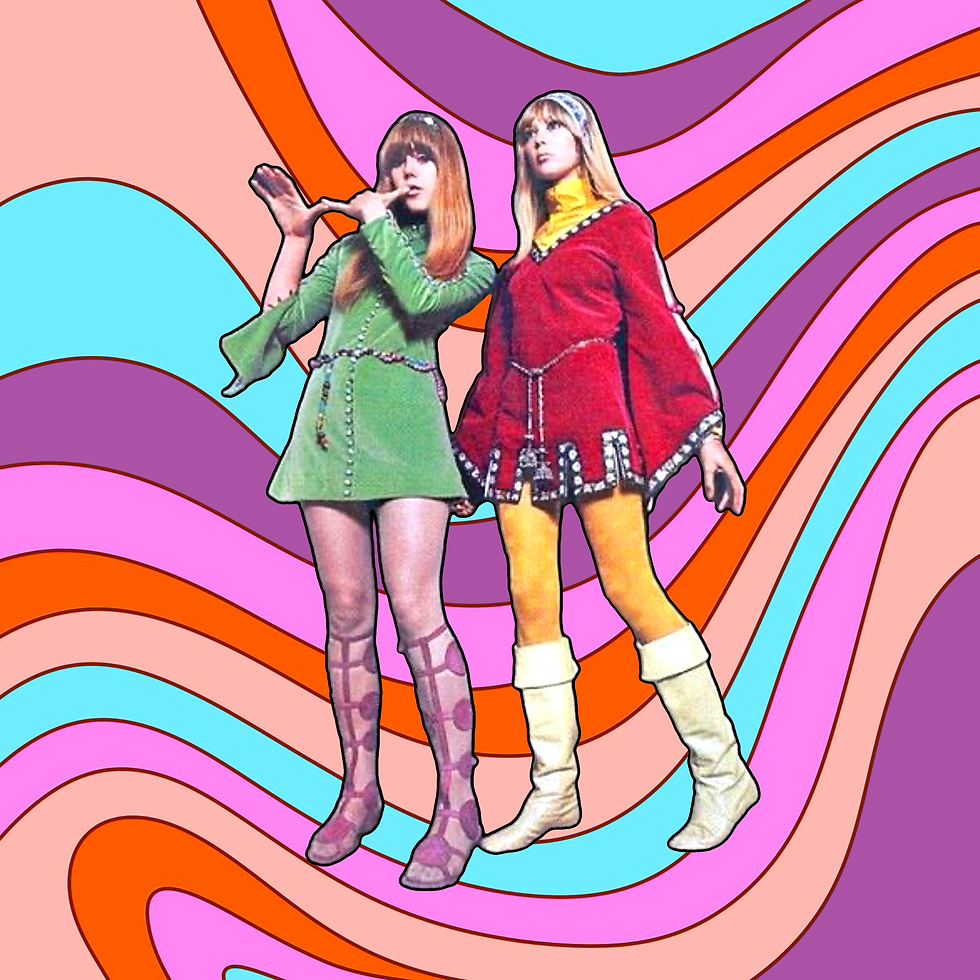
Main Graphic- I used this one of Pattie and Jenny Boyd by Karl Ferris because I don't know about you but 2025 was the YEAR of this photograph making the rounds!! I've been fond of it for so long and y'all know how hard I've studied it in my pursuit of the sandals, so I just thought ahh. Perfect. I cut the background out, replaced it with something more groovy and had them outlined before printing.

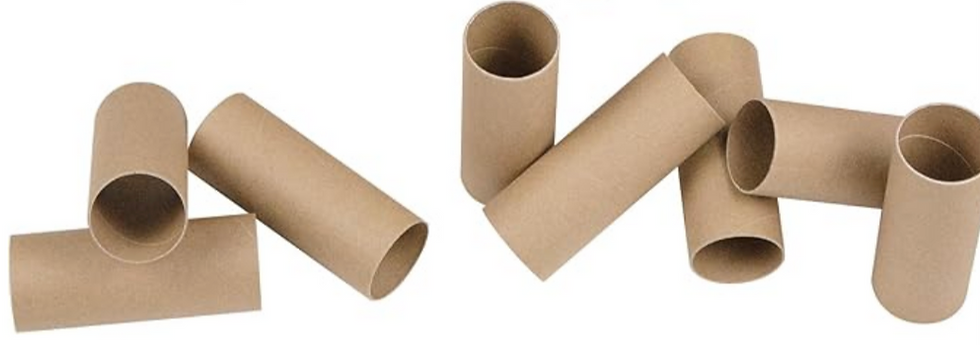
Empty Tissue Box + Toilet Paper Roll- Okay can I just say that when I'm through with a box of tissues (or cereal for that matter), I try to break the boxes down and save them. Because I ALWAYS need chipboard/cardboard that is thinner than a shipping box but sturdier than cardstock. And TP rolls are equally useful. I found that they slide onto the top of the tree perfectly. IF you are concerned about germs which I know most of you aren't because you don't go out wearing a trusty resperator to prevent the spread of covid flu and RSV, you can spray these with isoprop and poof. Sanitary and in tact. The alcohol dries quickly and doesn't compromise the cardboard. Just don't go too crazy.
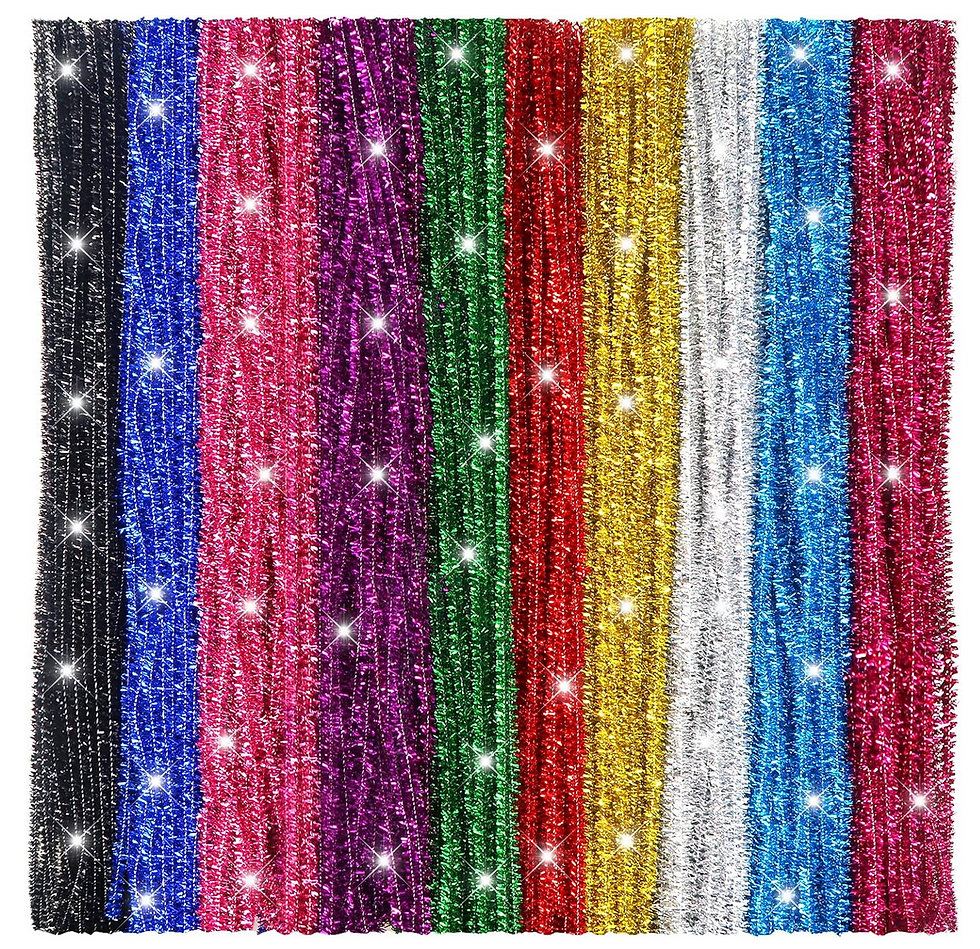
Tinsel Pipe Cleaner- I've been using these like crazy lately. Something about them is so vintage looking, I even used it in an antique-inspired ornament. For this I went with purple...I guess a subconscious nod to The Gladdies but also this tree is pink and their outfits are classic green and red so!

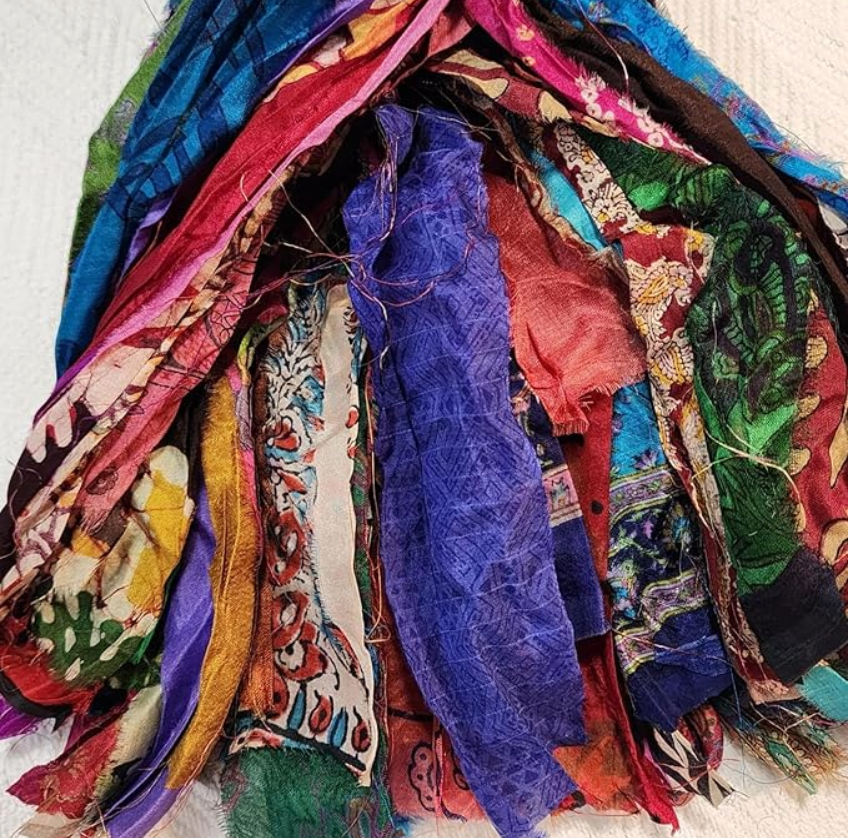
Sari Ribbon- In order to shore up the topper I wrapped it in paper tape and then tightly wound these scraps of fabric that are made into ribbon from pieces of sari fabric around the tube. It's very much in the spirit of the outfits in the photo and it makes this piece look good from all angles. I used this stuff all the time because it's soooo groovy.
Rhinestones- Again, another supply I have a full hoard of but I did end up using these specific ones that have the sticky backs. Even though I hot glued them on it was really helpful to be able to lightly stick them into place before committing! Plus they were the exact candy-colors I needed.

Sharp Scissors, Glue stick, Hot glue gun/sticks, PVA foam scraps, clear shiny contact paper- Pretty self-explanatory. You can use school glue for this stuff or mod podge but sticking the snowflake onto the cardboard roll called for hot glue full stop. I need sharp quality scissors for everythinggg, and it really makes cutting circles easier. I used the foam to "lift" the image of the girls off the snowflake. This is why I also keep my little scraps of foam okay you never know when you'll need some tiny squares of it.


Putting the darn thing together:
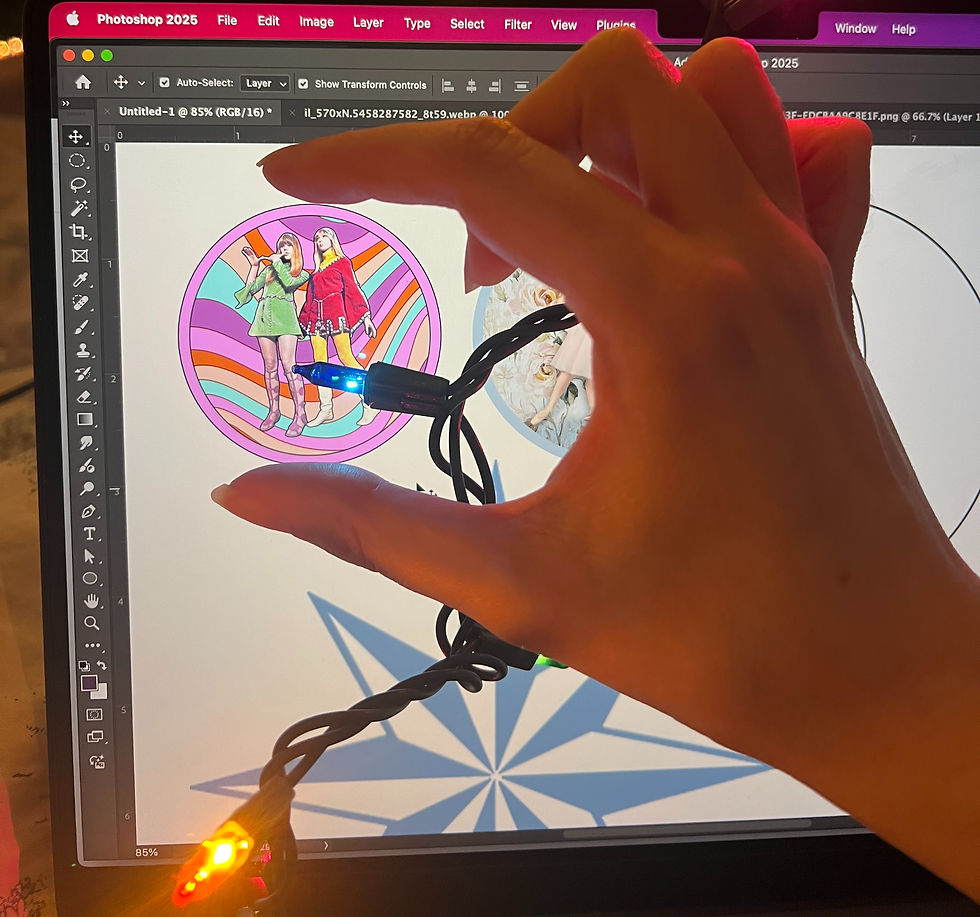
After sorting out the graphic design on my phone, I printed it out. To get the correct size every time, I plop it photoshop on a standard letter sized artboard and look at it on "Actual Size". I'm not a math person and need to see things exactly as they will be before I hit print! "Actual Size" is what you want for that. I also print multiple projects per sheet as you'll see, the more I do this.

I rough cut the graphic from the sheet and used my trusty glue stick to put it down onto my piece of cardboard saved from the tissue box. I then used a square of contact paper to laminate the top. It makes it look so professional and will help it last for years to come. Then I took the purple glitter pipe cleaner and hot glued it around that pink border. I added that border in the graphic on purpose so i would not obstruct the image itself. I recommend doing this as a habit. You'll avoid frustration in the future.

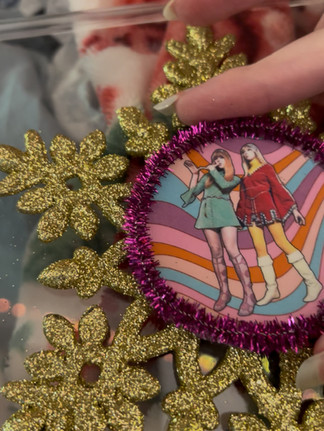
I found some little pieces of foam and cut them into small squares, hot glued them into the center of the snowflake and this provided a "lifted" platform for my Pattie and Jenny picture framed in purple. When I tell you I try so hard not to throw away scraps. This is why. I knew I'd need them!


For the base of this baby I covered the tp roll in paper tape (pink, actually) but it was still ugly so I used this sari ribbon to make it look posh. Another must-have in my craft stash. I think it's so cool I can use scraps of this ornate silk to turn a cardboard piece of trash into a treasure.


And now we can hot glue the snowflake to the covered roll. You might want to use 2 snowflakes to keep it balanced but I know my tree will be fine with just one and some branch finessing. It looks good but it's missing something...

RHINESTONESSS. I layed out the pattern and colors I wanted and then hot glued each stone on. Proud of myself for not going too nuts on the bling. Very unusual but I wanted the shape of the snowflake to still remain and let the center image shine. Still. So prettyyyy.
And that's it. My tree topper made from a broken snowflake, a clever graphic, some rhinestones and fabric scraps...and of course the base of a cardboard tp roll. I've got 3 more toppers to go. If you enjoyed this one, by all means let me know in the comments. And remember you can do this in any size. I hope Pattie and Jenny Boyd don't mind being our christmas angels this year ;D Like I said, this singular photo has been on my mind for the better part of the past 2 decades but I've never seen it go around as much as I did this year, so I really love that I was able to pay tribute to it because it is such an iconic piece of art by Karl Ferris. It is perfect for my 60s pink mini tree!


Looks great! Also making me want a little laminator machine so I could laminate images for stuff like this!